Skip to content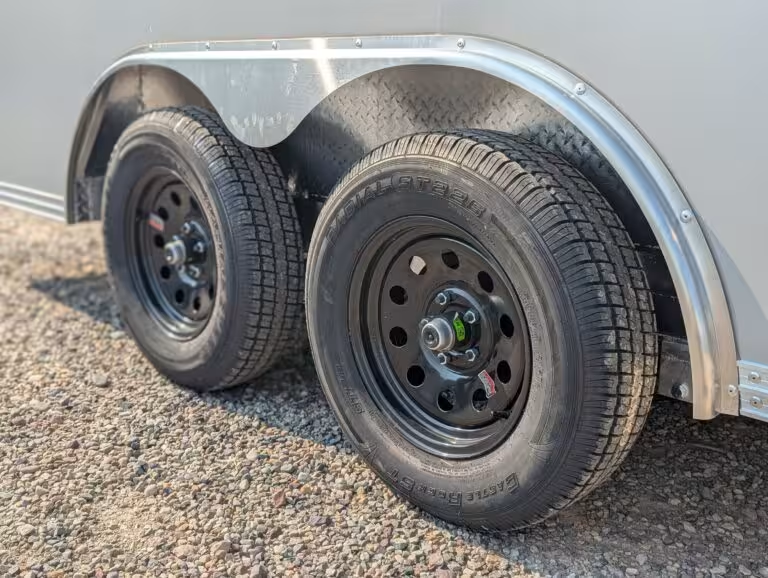

A well-maintained trailer is safer to tow, more dependable, and less likely to leave you stranded. If you are looking for trailer maintenance tips, fortunately, many of the most important trailer checks only take a few minutes.
Use this guide as a practical starting point, but always follow the instructions and service intervals provided by your trailer, axle, brake, wheel, and tire manufacturers. Specifications can vary considerably between trailers.
Start With a Secure Connection
Never assume the trailer is securely connected just because the coupler appears to be sitting on the hitch ball. Take a moment to check the complete connection every time you tow.
1. Confirm that the towing equipment matches
Before connecting the trailer, verify that:
- The hitch ball is the correct size for the trailer coupler.
- The hitch, ball mount, ball, and tow vehicle are appropriately rated.
- The trailer’s loaded weight does not exceed its Gross Vehicle Weight Rating.
- The tow vehicle is rated to pull the trailer’s actual loaded weight.
- The receiver pin and retaining clip are completely installed.
The towing system is only as strong as its lowest-rated component.
2. Seat and lock the coupler
Lower the coupler completely onto the hitch ball. Close the coupler latch and install its safety pin or lock.
Before fully retracting the tongue jack, raise the trailer tongue slightly. A properly connected coupler should remain securely attached to the ball. If the coupler lifts off, lower it, reopen the latch, reposition the connection, and try again.
Never tow without securing the coupler latch with its designated pin or lock.
3. Cross the safety chains
Attach the safety chains to the tow vehicle in a crisscross pattern beneath the trailer tongue. This creates a cradle that may help support the tongue if the primary connection fails.
Chains should:
- Be rated for the trailer.
- Attach to secure points on the tow vehicle.
- Have enough slack for turns.
- Remain off the road.
- Never be twisted simply to shorten them unless the manufacturer allows it.
4. Connect the breakaway cable correctly
If your trailer has brakes and a breakaway system, connect the breakaway cable directly to a secure point on the tow vehicle—not to a safety chain.
The cable needs enough slack for normal turns but should not drag or become tangled. Its purpose is to activate the trailer brakes if the trailer completely separates from the tow vehicle.
5. Finish the connection check
Before leaving, confirm that:
- The trailer plug is fully connected.
- The tongue jack is completely raised or rotated into its travel position.
- Wheel chocks have been removed.
- Ramps, doors, gates, and latches are secured.
- The load is properly positioned and tied down.
- Nothing is hanging underneath the trailer.
CURT’s trailer hookup guide provides a helpful illustrated walkthrough of the connection process.
Check the Tires Before You Tow
Underinflated, overloaded, damaged, or aging tires are common sources of trailer trouble.
Check every trailer tire—including the spare—with an accurate pressure gauge. Measure pressure when the tires are cold, before driving has warmed them. Inflate them according to the trailer or tire manufacturer’s specifications, while staying within the limits of the tire and wheel.
The U.S. Tire Manufacturers Association recommends checking tire pressure at least monthly and before long trips, heavy loads, or towing. Temperature changes also affect pressure, making these checks especially important during Montana’s seasonal weather changes.
While checking pressure, inspect each tire for:
- Cracks or dry rot.
- Bulges, cuts, or punctures.
- Uneven or excessive tread wear.
- Exposed cords.
- Objects embedded in the tread.
- Signs that a tire has been rubbing against the trailer.
Uneven wear can indicate improper inflation, overloading, loose suspension components, wheel misalignment, or a damaged axle. Don’t forget to inspect and inflate the spare tire—it won’t help if it is flat when you need it.
For additional tire guidance, see the USTMA Tire Care Essentials.
Keep the Wheels Secure
Loose lug nuts can lead to damaged wheels, broken studs, or wheel separation.
Use a properly calibrated torque wrench and tighten the lug nuts in the correct pattern to the specification provided by the trailer or wheel manufacturer. Do not guess based on how tight the lug nuts feel.
Recheck lug-nut torque after a wheel has been removed, after new wheels are installed, and during the initial mileage intervals specified by the manufacturer. This is especially important with a new trailer.
Maintain the Wheel Bearings
Wheel bearings carry the trailer’s weight while allowing the wheels to rotate freely. When bearings lose lubrication or become contaminated, they can overheat and fail.
Possible warning signs include:
- Grinding, humming, or growling noises.
- Excessive movement when the raised wheel is rocked.
- Grease leaking around the hub or brake components.
- A hub that becomes unusually hot.
- Roughness when the wheel is rotated.
- A burnt-grease smell.
During longer trips, periodically walk around the trailer when you stop. Without touching the braking surface, carefully check for one hub that is noticeably hotter than the others. Use caution because a failing hub or brake can become hot enough to cause a burn.
Bearing designs and maintenance requirements vary. For many serviceable Dexter axle systems, lubrication is recommended every 12 months or 12,000 miles, but owners should follow the schedule for their specific equipment. Boat trailers and trailers exposed to water, mud, dust, or severe service may need more frequent attention.
Bearing service also requires correct adjustment and seal installation. If you are unsure how to perform it, have the bearings inspected and serviced by a qualified technician. See Dexter’s bearing lubrication guidance for additional information.
Inspect the Axles and Suspension
Axles and suspension components take a considerable amount of stress, especially on rough roads or when carrying heavy loads.
Regularly inspect:
- Leaf springs for cracks, breaks, or flattening.
- Spring hangers and shackles for wear or damaged holes.
- Equalizers and suspension bolts.
- U-bolts and axle mounting hardware.
- The axle tube for visible damage or bending.
- Welds and frame attachment points for cracks.
- Rubber components on torsion axles for signs of damage.
- Tires for wear patterns that may indicate an alignment problem.
A trailer that leans, pulls to one side, bounces excessively, or repeatedly wears tires unevenly should be inspected. Do not weld, straighten, or modify an axle without guidance from its manufacturer or a qualified trailer professional.
Test the Lights, Brakes, and Breakaway System
Before every trip, test:
- Brake lights.
- Running lights.
- Left and right turn signals.
- Hazard lights.
- Electric or hydraulic trailer brakes.
- The in-cab brake controller, when equipped.
- The breakaway system and its battery according to the manufacturer’s instructions.
Trailer brakes should engage smoothly and evenly. If the trailer pushes the tow vehicle, pulls to one side, makes unusual noises, or behaves differently than normal, stop and have the system checked.
Brake adjustment and inspection intervals vary by axle and brake design. Follow the manufacturer’s manual rather than waiting for a noticeable problem.
Complete a 60-Second Walk-Around
Before pulling onto the road, walk completely around the trailer and verify:
- Coupler seated, latched, and pinned.
- Receiver pin and clip installed.
- Safety chains crossed and secured.
- Breakaway cable attached separately.
- Electrical plug connected.
- Jack fully raised.
- Tires properly inflated and undamaged.
- Lug nuts secure.
- Lights and brakes working.
- Cargo balanced and tied down.
- Doors, gates, vents, and ramps latched.
- License plate visible.
- Spare tire secure.
- No tools, chocks, straps, or loose objects left behind.
Repeat a quick walk-around after the first few miles and at fuel or rest stops during longer trips. Look for shifting cargo, loose straps, unusual tire wear, heat, smells, or anything that has changed.
A Simple Maintenance Schedule
Before every trip
- Check the hitch connection, chains, breakaway cable, wiring, lights, brakes, tires, load, doors, and ramps.
Monthly
- Check cold tire pressure, including the spare.
- Inspect tire condition and tread.
- Examine wiring, chains, coupler, and safety equipment.
- Look for loose, worn, cracked, or damaged components.
Seasonally
- Inspect the frame, floor, roof, doors, seals, suspension, axles, and brake system.
- Lubricate hinges, latches, the coupler, and other service points as directed.
- Check the breakaway battery and brake controller operation.
Annually or at the manufacturer’s mileage interval
- Service or inspect wheel bearings.
- Inspect and adjust the brakes where required.
- Inspect suspension hardware and axle mounting.
- Check wheel and lug-nut condition.
- Complete a thorough professional inspection if the trailer sees frequent or heavy use.
When in Doubt, Stop and Check
If you hear a new noise, feel unusual movement, smell something hot, notice a tire losing pressure, or see a hub running hotter than the others, pull over somewhere safe and investigate.
A few minutes spent checking the trailer can prevent an expensive repair—or a dangerous situation on the road.
If you have questions about your trailer, parts, maintenance, or safe operation, contact the team at Western States Trailer & Auto. We’re always happy to help you understand your equipment and keep it working properly.